
This post is sponsored by our friends at Almond Cow
All opinions are my own
I'm in love! I'm in love, and I don't care who knows it! Danielle here, with yet another Christmas movie reference. Sorry.
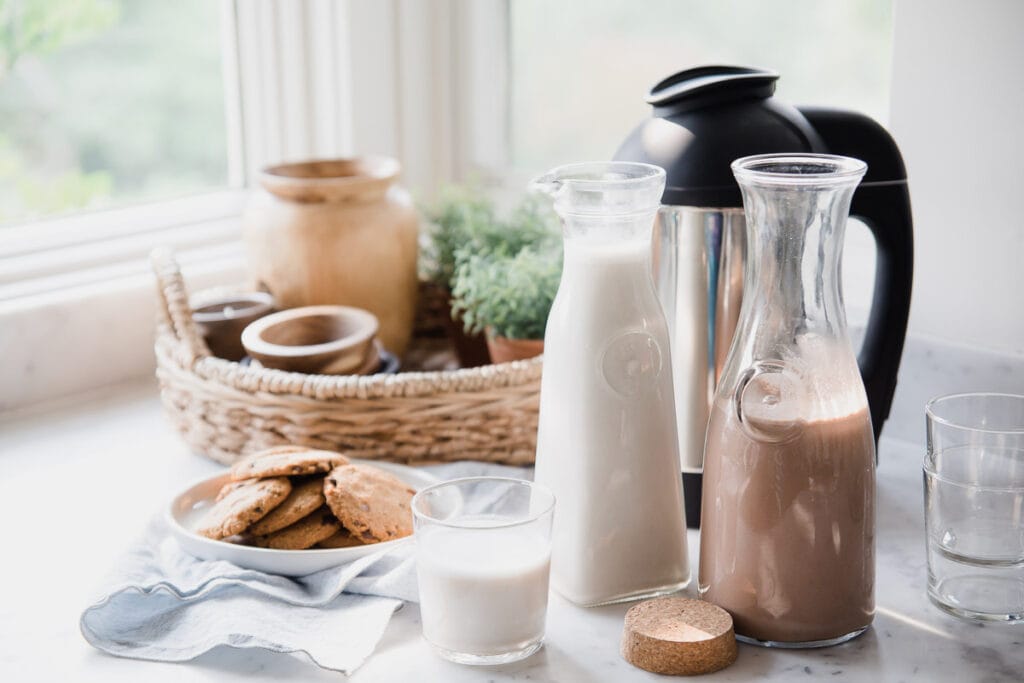
But really. I'm in love with a new machine in my life. The Almond Cow.
Use code DANIELLEWALKER for $25 off any Almond Cow purchase of $200 or more
I'm not usually one to purchase a lot of kitchen gadgets or small appliances. I tend to lean towards minimalist, and especially like to keep my kitchen counters clean. So when I heard about the Almond Cow in it's start-up days, a machine for making homemade dairy-free milk a few years ago, I will admit, while I was incredibly intrigued, I wasn't an early adopter.
Nut milk bags, blenders, spills, and soaking
Though my lack of early adoption wasn't because I was happy making homemade dairy-free milk in my blender. To be completely honest, after spending the first few years of my paleo journey making everything from scratch- condiments, almond milk, coffee creamer, beef jerky, granola – I was burnt out. Especially with the nut-milk making process.
This will sound dramatic, but it's the truth – I did not ever want to look at a nut-milk bag again, and I always, always, forgot to soak almonds 24 hours in advance of needing almond milk for a recipe. The process of soaking, pureeing, and then hand squeezing the liquid out of a cheesecloth bag was messy and time consuming. I had milk miss the bowl every time (maybe it was just me, but I always had pools of wasted milk on the counter after diligently “milking” that nut milk bag like a cow's udders).
And I usually wanted the immediate gratification or needed the milk immediately for recipe testing. I switched from making almond milk to making cashew milk more frequently because I could do a quick soak and it didn't need to be strained. I haven't made a homemade batch of almond milk in at least 5 years.
The Problem With Store-Bought Milks
The problem is that most brands on the market contain fillers and stabilizers like Carrageenan, Guar Gum, Gellan Gum, Acacia Gum, Sunflower or Soy Lecithin, Dipotassium Phosphate, Cellulose Gel/ Cellulose Gum, Locust Bean Gum. And the ones that don't are triple the price.
These can all be hard on the gut, causing digestive discomfort, bloating and inflammation. Plus I don't really care for the flavor and texture that all of those ingredients lend to store-bought almond milk.
Some cleaner store-brands started emerging onto the market and I succumbed to just buying it. Always. Spending $6-$8 per bottle.
Reducing Single-Use Plastic
In addition to the problem of spending $6-$8 a bottle that lasted for 3-5 days, we have been diligently trying to reduce our use of single-use plastic in 2020, and store-bought nut milk was one area I knew we could reduce in.
So I finally gave in and tried out the Almond Cow. They gifted me a machine, with no obligation to talk about it, but after a few batches of fresh, homemade milk, I was sold.
I used to purchase a bottle of almond milk weekly, so in just our home alone we are saving 52 plastic bottles a year.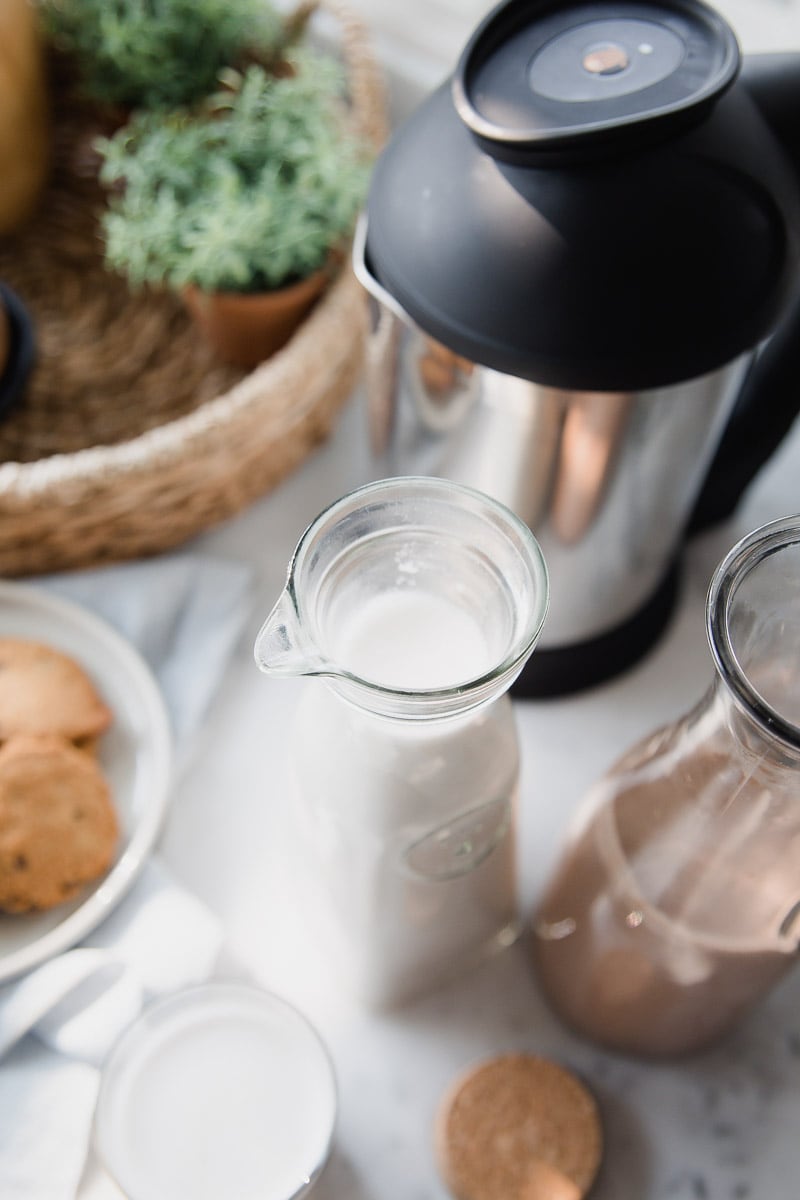
Use code DANIELLEWALKER for $20 off any Almond Cow purchase of $200 or more
Why I'm In Love With Almond Cow
Aside from the plastic saving, there's no squeezing and no messes of the milk missing the bowl. No fillers, no binders or stabilizers. It's incredibly easy to clean, which I was afraid it wouldn't be. Much easier than scraping out the inside of a nut-milk bag and washing it free of residue. You also get all of your pulp to use in other recipes, which I always felt I wasted some when I made homemade and couldn't get it all out of the bag.
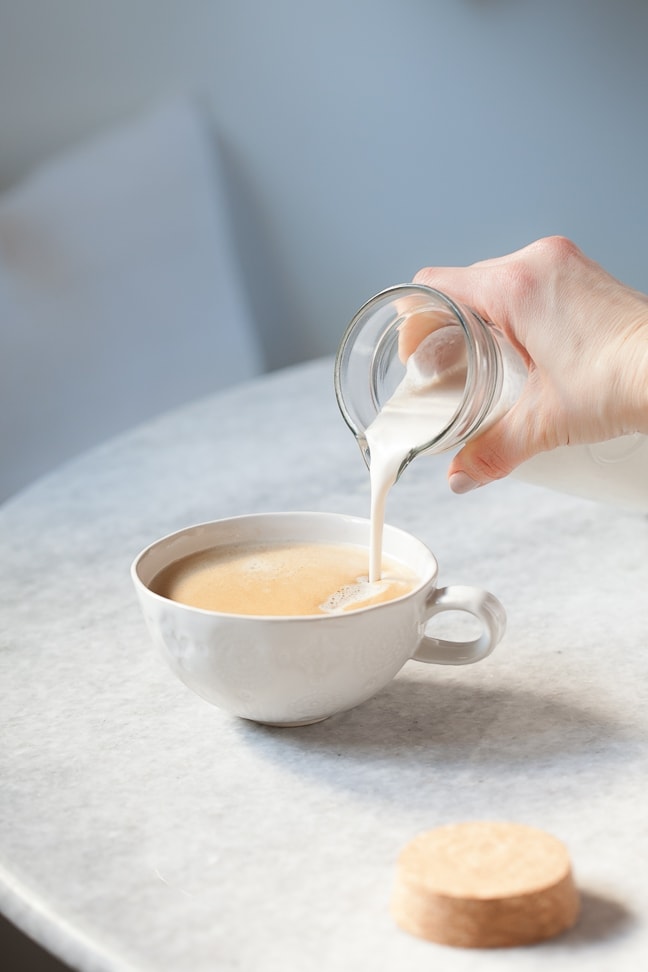
I know every ingredient that goes into my homemade dairy-free milk, and it's simple – nuts or coconut, water, sea salt. That's it. Unless I'm sweetening it and then there's a date or maple syrup and maybe some vanilla.
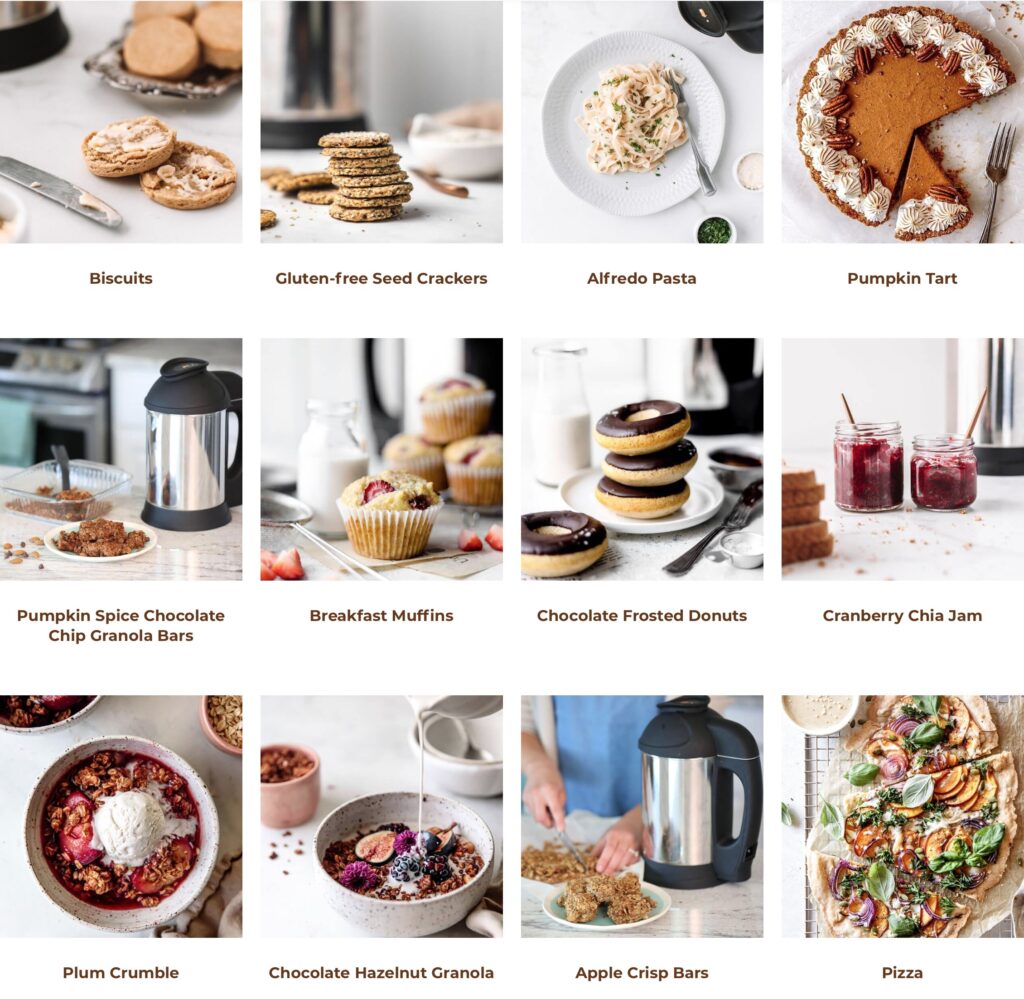
I can make all of my favorite coffee creamer recipes in it – Pumpkin Spice, Gingerbread, Vanilla. You can have so much fun with what you make – Hazelnut, Walnut, Pecan, Almond, Cashew. Chocolate, Horchata, Eggnog, Golden Milk. You name it! Be sure to see some of my favorite recipes below!
And the best part – I can have it ready in minutes. I've had it for a little over a month now and have already made at least 12 batches of milk or coffee creamer.
Cost Analysis
After calculating the cost of the machine and the cost of the ingredients, I figured out that it will only take around 30 batches of milk to pay for itself. Especially if I use up the nut-pulp in other recipes like cookies, granola, crackers or porridge. 50 batches or so if I don't.
That's one area that has always bothered me about store-bought milk (similar to buying boneless chicken!) – the bottles contain a much higher water to nut ratio, and what happens to all that pulp? When you make it yourself, you get to use every part of the ingredient, nose to tail if you will, making it much more cost-efficient.
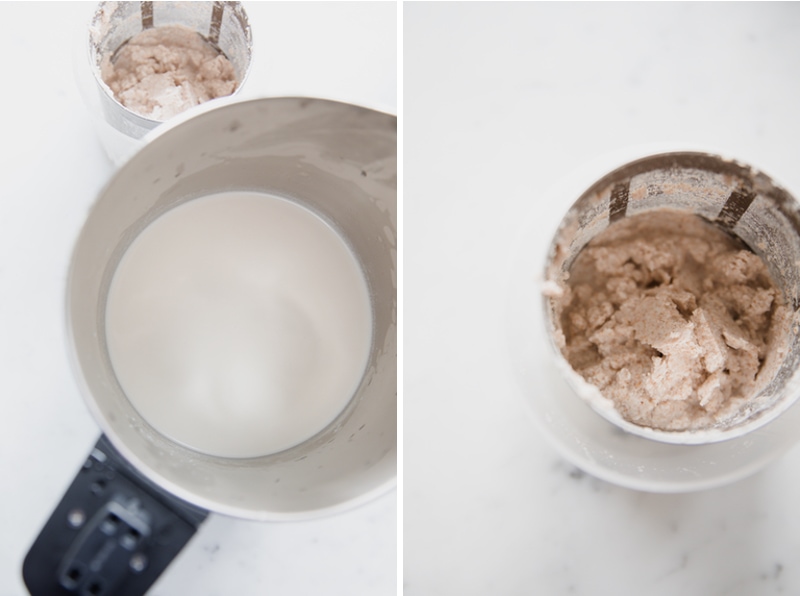
Pulp What?
Nut pulp is what is leftover after straining out the liquid for your milk. It's actually really valuable – it's the meat of the nuts. There's a ton leftover and it works great dehydrated and blitzed in a food processor to use as flour, or blended into recipes in its damp state.
Try my Almond Pulp Rosemary Crackers or Almond Pulp Double Chocolate Cookies. Dehydrate it into granola mixed with some maple syrup, raisins and sliced nuts, or use it in my Paleo Breakfast Porridge.
There's dozens of recipes for pulp over on the Almond Cow website too that I can't wait to try – from muffins to cake pops to cupcakes to savory tarts.
 Do You Need One?
I think it depends how frequently you purchase versus make homemade dairy-free milk, and how many people in your household drink it. I figured out I was purchasing 1 bottle a week. My kids or Ryan will occasionally have it over granola, but I drink it every day in my coffee, and I use it a lot in recipe testing and baked goods. My kids will, however, down an entire jug of the chocolate milk (recipe below!!) in just a few days if I make it!
If you're purchasing the same, or even more frequently, the cost and knowing exactly what's it in your milk is worth it in my opinion.
If you're ready to give it a shot – I have a special discount code for you, and some recipes to get you started!


Diana Adame
Thank you for the recipes! I absolutely love my Almond Cow!!! It has already payed for itself– I really love the fruit fusions, too.
Danielle
I’m excited to try the fruit fusions next!
Sarah
Hi! You mention forgetting to soak your almond 24 hours prior to making milk. I see that your recipes still call for soaking them for 24 hours, etc. Do you freeze them already soaked? I’ve read somewhere that that’s possible, but to “be sure nuts are dry before freezing”. How dry do they need to be? Just dry to the touch? I’m guessing not dehydrated, right? Thanks!
Dorothy K.
Hi Danielle, thank you for introducing me to this product. I trust your judgement after following you for years and purchasing all your books. I went to the Almond Cow site and am unclear about something. If I use this product do I have to purchase their ingredients? Is it like a subscription or something? Can I buy/use my own ingredients?
Thank you for all you do and all you share. You’ve made my restricted diet journey easier and tastier. Sincerely, Dorothy
Danielle
Hi Dorothy,
Thank you so much for placing your trust in me – I appreciate and cherish your continued support! To answer your Almond Cow questions; no it is not a subscription and you don’t have to buy their ingredients. The Almond Cow will work with your own ingredients; they’ve just made it a convenient one-stop shop for everything you need to start using their product. Let me know if you have any other questions! =D
Jennifer G
LOVE my Almond Cow! It’s worth every penny. I’ve used it for about 9 months now and I completely agree with your blog comments and I’m so excited you tried it. My husband loves the idea of chocolate cashew milk, which I haven’t tried yet, but it’s now on our list. Thanks Danielle!
Cynthia
Danielle, I have to admit that I live right in Atlanta where this was created and ai never knew it existed until I saw your Instagram. I want to try this for milk, snacks, treats, sauces, etc. the list goes on and on. Thank you for introducing me to this machine. I need this in my life and the lives of my children! Can wait!
Melody S
I ordered mine a few weeks ago. It due to arrive Monday. I’m so excited to have the mix of nut milks with no stabilizers or sugars. Everytime I find nut milk coffee creamers that I love they either get discontinued or sell out. I’m excited to experiment! Thank you for giving this a whirl abc heads up on some great recipes! I’ll be following for any future recipes!
Jillian
Love this almond cow! I have so many kitchen items that I try not to purchase anymore, and this one is a bit pricey. That being said, I got so sick of making almond milk that I was buying it at whole foods. I did not really like it. This machine kinda shocked me at how quick and easy it was. I made a few changes in the recipes. The first time I used the half cup soaked almonds in the almond cow recipe. It seemed watery. Today I used one whole cup soaked almonds and it is perfect. One caveat that may be just me…I do not like any sediment…so I ran it through a disposable paper paint filter my hubby gave me. Ta Dah! Perfect.
Cynthia
I have to admit that I love kitchen gadgets but this one takes the proverbial cake! I no longer buy any milk since all of my family loves the almond cow milk. I really like the milk bottle and brush as well. The bottle keeps the milk super cold.
Cindy Sheppard
Where is the Almond Cow made? Where is it shipped from? How long does it take to arrive? Thanks
Giuliana
Hi!! How are you? I have a question if you’re able to answer me! So I switched to a vegan diet in March last year, but I stopped having coffee which I love because I can’t stand how plant milks don’t mix well with the coffee haha I’ve been eyeing the almond cow for months now and never purchase it because I’m scared that the creamer that you can make in it won’t mix well in my coffee either. Does it mix well like half and half you think? Thank you so much for your time!
Danielle
I personally think it mixes in with coffee well!!
Valerie
Hi! I just purchased the Almond Cow and made my first batch of almond milk using the recipe 1/2 C soaked almonds and sea salt it turned out more watery than creamy when I make it with my blender/nut bag. I saw your tips on running the cycle again after a few mins. Would you also suggest using more almonds? I usually did 1.5C soaked almonds and 6 C filtered water.
Thanks for taking the time to read – hope you respond – love your recipes!
Danielle
Before using more almonds, I would suggest running the cycle again. I’m so happy you’re enjoying the recipes!!
Sara
Hi I have an almond cow and love it! Can I ask where you purchased your glass carafes? Love those!
Danielle
I can’t remember! They may have been thrift finds – ha ha!
Andrea
Hi! Thanks for sharing your tips! I was wondering why you soak the almonds? I just bought one and in the ads I saw before purchasing, they didn’t show that they were soaked. If you tried them both ways, did you notice a difference? Does the milk turn out smoother or does soaking help with better digestion? Thank you for your time!
Sarah
Hi! You mention forgetting to soak your almond 24 hours prior to making milk. I see that your recipes still call for soaking them for 24 hours, etc. Do you freeze them already soaked? I’ve read somewhere that that’s possible, but to “be sure nuts are dry before freezing”. How dry do they need to be? Just dry to the touch? I’m guessing not dehydrated, right? Thanks!
Jen
I’m about to use mine for the first time (because of you)! In the video you mention making hot chocolate for the kids out of this. Do you have the recipe you could share? And thank you for making a paleo (inflammation free) lifestyle enjoyable!
Yvonne
I am new to using the almond cow and was looking up creamer recipes. I’m curious as to why your recipes call for soaking the nuts and the almond cow recipes do not? I have seen this asked a couple times, but didn’t see a response, so apologies if you answered this somewhere else. Thank you!
Debbie
Hi! Do you still have a discount code for the almond cow? I’d love to buy one and would love even more if I could get a discount of course! Thanks!!!
Danielle
Hi! Currently, you can use DANIELLEWALKER at checkout for $20 off. Enjoy!!