Easter is upon us, and that means we get to crack out our favorite traditions like sunrise services, easter egg hunts, easter baskets, and egg dyeing! I'm excited to share this Naturally Dyed Easter Eggs recipe with you.
I can think back to growing up and dyeing eggs in my kitchen with my siblings and parents all suited up in an apron and sometimes even rubber gloves so my hands didn’t turn crazy colors. Back then, we used standard food dyes that you would find at a grocery store. Specifically the ones you probably don’t want in your kitchen anymore after studies have shown consuming these dyes can cause hyperactivity amongst other reactions.
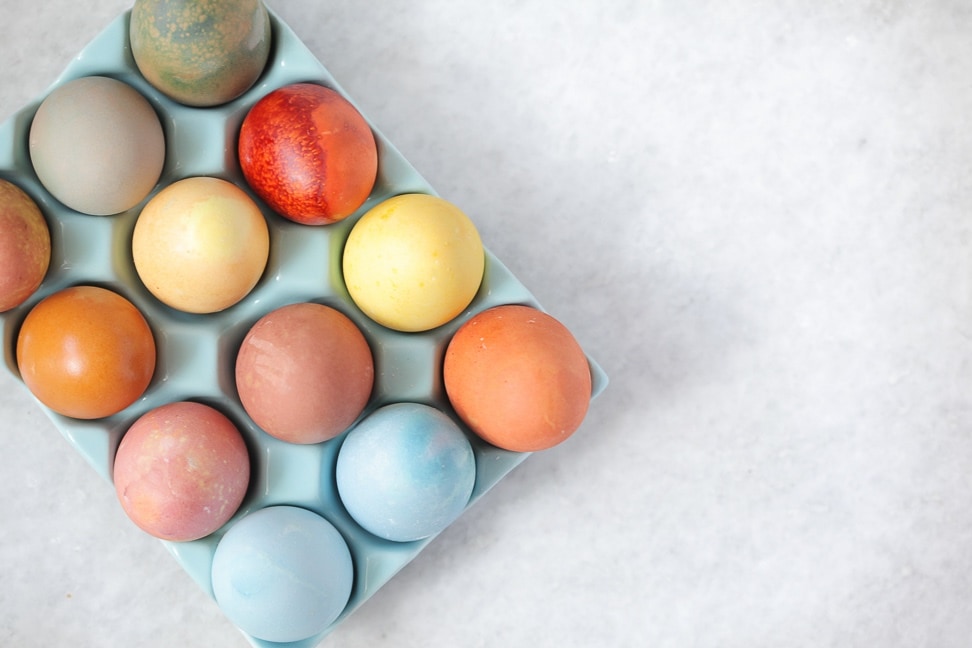
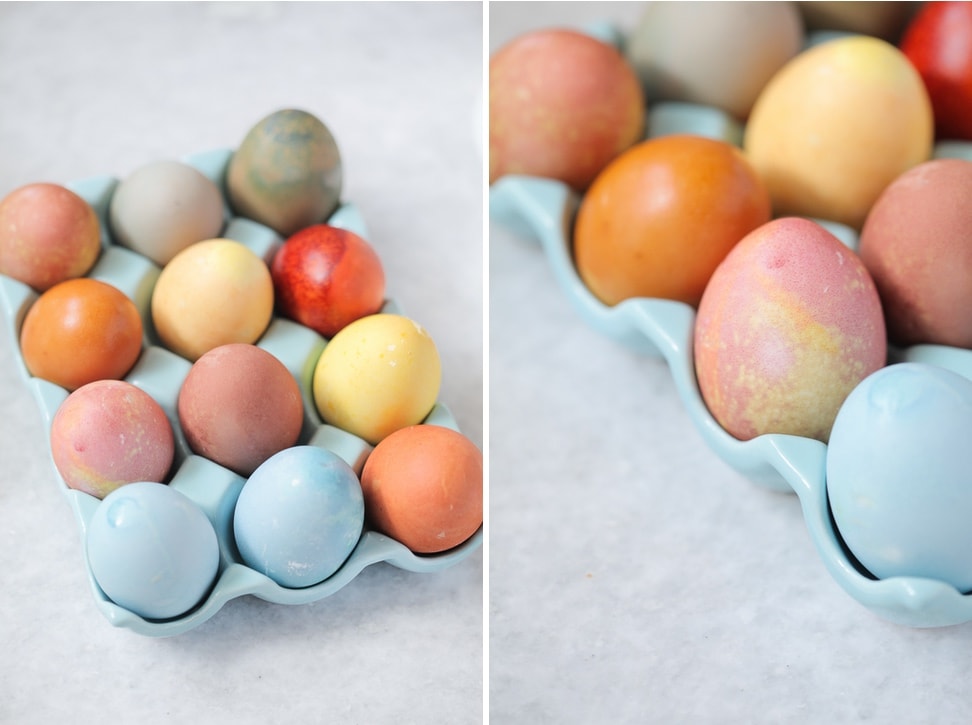
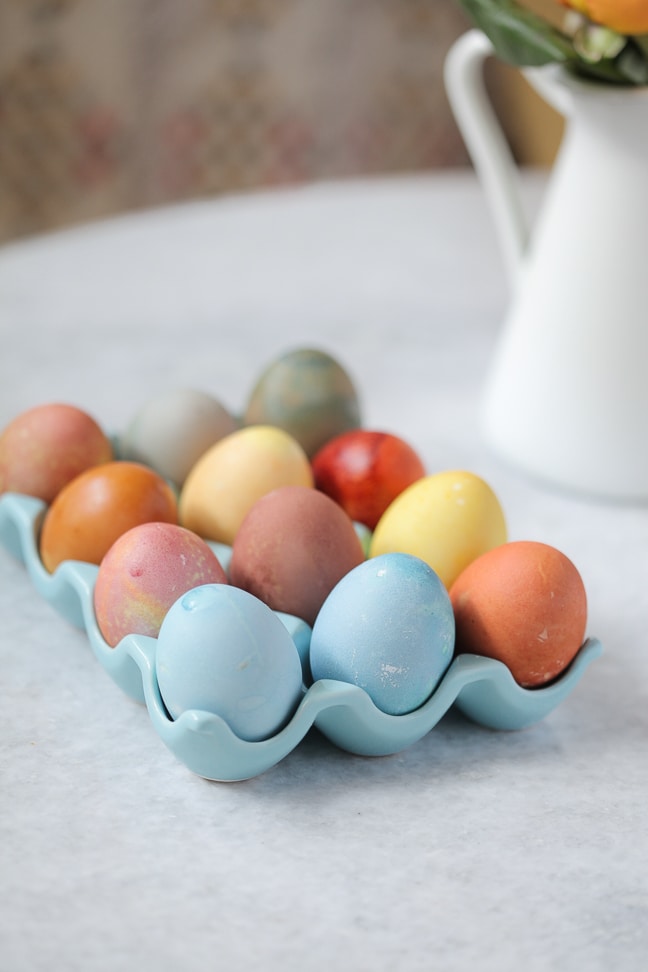
That said, I wanted to bring you some fun dyes colored with natural ingredients that you can find in the produce or spice section at your local grocery store. While you may not always get the same results each time you dye eggs, I’ve come to love the natural more muted colors that are created when dyeing naturally! And my kids absolutely love seeing how ordinary vegetables and fruits can make pigmented dyes.
Click to See my Instant Pot Hard Boiled Egg Recipe!
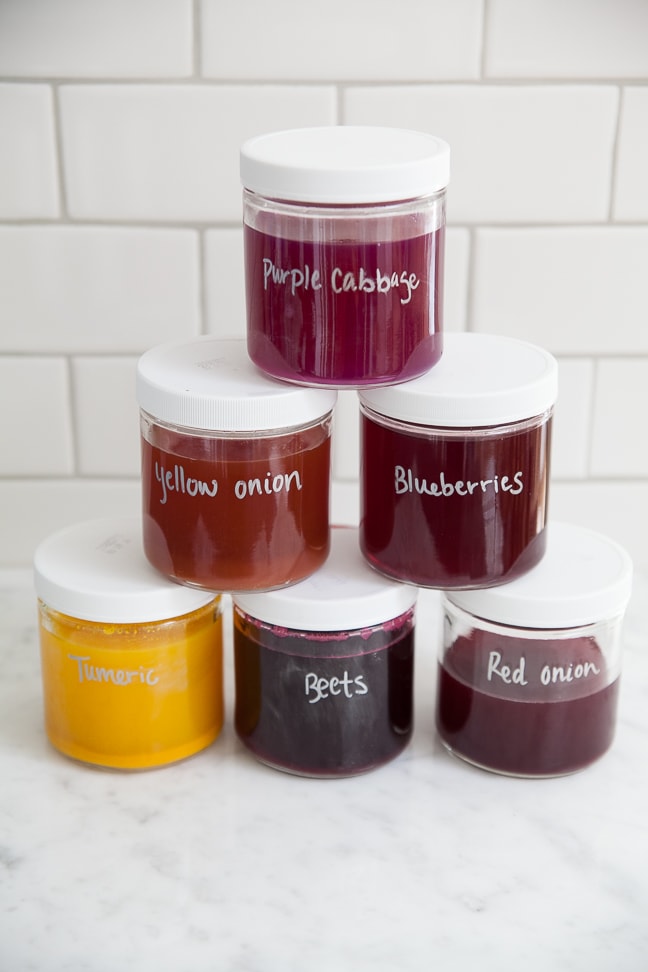
Below you’ll find a little guide for Naturally Dyed Easter Eggs which will outline what produce/spice will equal what color. It’s a pretty simple process of simmering the ingredients with water and then soaking the eggs in the dyeing liquid. Again, it’s great to keep in mind that you may get slightly different variations of the “color wheel” below. For instance, if you use purple cabbage, it may turn out super green more blue (which is really fun for the kids to see, considering the dye is a bright purple color!). It really varies based on each individual produce item, and how concentrated the dye is.
Beets: Red
Yellow Onion Peels: Orange
Purple Cabbage: Green/Blue
Turmeric: Yellow
Red Onion Peels: Reddish Brown
Frozen Blueberries: Grey/violet
Another thing to keep in mind is that the colors will change based on what kind of egg you use anyhow many times you dip and dry it. If you use brown eggs the colors will have more of a well.. brownish hue. If you use white eggs, the colors will show up more pure since it’s working with a white background. If you make the purple cabbage dye and are hoping for a green hue, use a brown egg, but if you’re looking for more of a true blue, use a white egg. We found that we liked the colors better using white eggs.

Cathy Thomes Behrens
Thanks, Danielle! You have some beautiful colors and I’m excited to get working on mine. Would it work to just do 1 C water with the respective ratio of produce and put it in a pint jar to soak one egg at a time? I don’t see me needing 5 cups of anything 🙂
Btw, I hope you’re doing better!
Danielle
Yeah that should work
Cathy Thomes Behrens
Thanks!
Andrea Balestino Edleblute
I was just looking posts on naturally-dyed Easter eggs! Thank you for sharing!
Kaitlyn
Love the colors and easy to get ingredients! Did you use white eggs? I prefer pasture raised but seem to only ever find brown eggs.
Danielle
Yes I used white eggs for these!
Alison Adnan
How far in advance can you prepare the dyes?
Marie Conway
https://uploads.disquscdn.com/images/0a58068c1b7af6729ef45969440d75a4cf0cd4f3ad65d886a29795d2e63600b4.jpg https://uploads.disquscdn.com/images/3b21ccfbef2ed3adefab59b6fb1237ba1f5e3b3b793f451da2458c796100c2da.jpg https://uploads.disquscdn.com/images/0f66854ba9beb674c943b9459a2f0b36462bf283ccc79a6a7c23554b4b59412b.jpg
In the egg carton, the top row was soaked for an afternoon, the bottom row over night! Used Tumeric, Blueberry, Spinach, Beet, Red Cabbage, and a combo of beet and red cabbage! Need to start saving the onion peels for next year! We also had the Kitchen us a VitaMix mixer for the “shred” the beets and the red cabbage!
So so SO fun! :). I did this with my classroom! Thanks so much!
Danielle
Love this! Thanks for sharing 🙂